Pages

Thursday, October 31, 2013

Cuddle Capelet by Whimsy Couture

Whimsy Couture is offering a FREE PDF pattern/tutorial for a very cute and cozy little cape sizes tweens to ladies.

When the testing call came up I was so busy with other porjects that I didn't volunteer. A few days after that I just so happen to go window shopping with JubeJube and Amelia and look what I saw!

Image by Blü

It was the Cuddle Capelet! That did it, I knew I had to get it done! Besides, I already had the minky.


You might remember the top from here, another Whimsy couture pattern the Boho Tunic.


See what I mean, how could I not get this super easy, 20 minute project done. 


Thursday, October 24, 2013

Hooded Raglan Sleeve Coat by Dress Patterns 4 Girls

What a way to brighten up a gloomy fall day, and the perfect jacket to keep your little one all warm and dry. Dress Patterns 4 Girls now has this pattern for sale in their Etsy shop. A raglan sleeve coast with a slight a line, button or snap closures down the front and practicle hood. And yes pockets too, Amelia's favorite! 

I used a laminated cotton (ladybugs in the Urban Zoologie line by Robert Kaufman) and a red micro fleece to line the whole coat for warmth. 


I think the length of the coat is just perfect.


I used snaps on the pocket flaps, and the sleeve have a turned cuff, perfect for little ones to grow into.


Monday, October 21, 2013

Norah 2 Ways by Mouse House Creations

I'm so excited for Hayley of Mouse House Creations. Today is the big day, the first pattern from Mouse House Creations is now available here! Guess what, I got to test it...YAY! 

The first dress that I got together using the Norah pattern was for Amelia. I made her a dress from grey suiting and added the collar with ties made of a white cotton with red polka dots. 


This little a-line dress goes right to the knee and you have the option of long or short sleeve. I went with the sort sleeve to be able to layer it with a cardy. The back is a button closure but a zipper can easily replace that button. The bodice is layered.


I just love the finished look of this dress, so vintage! 


Kill 2 birds with one stone...Now Amelia is dressed for Christmas!


That was the dress, now for the tunic. Same pattern just different options, who doesn't love that?


For this one I used light weight knit fabrics for the collar and bodice. The fabric for the collar has sequins on it for a little of a sparkle.


I decided to go sleeveless for this one, and its lined just like the dress.


Just a simple slit at the back with a button closure, and to finish it off a rolled hem with the serger.


JubeJube likes her new top and was more than pleased to model for me, but evey now and again she has me comply with her wish to have her picture with her favorite grey cat. How could I not comply.


So there you have it the Norah pattern done 2 ways for 2 really different looks. I'm really anxious to see the new things Hayley and Mouse House Creations has in store for us. 


Saturday, October 19, 2013

Break Time


A quick sisterly hug between mini shoots of outfits that I sewed up for pattern testing. More photos as soon as the patterns are released.


Wednesday, October 16, 2013

Cordelia Sweetheart Peplum by My Little Plumcake

A new pattern by My Little Plumcake is now available! Right now you can get it for 25% off in their Etsy shop! No coupon code needed! This is for a limited time, so hurry!


For the cooler fall days I layered it with a long sleeve-tee because this one is sleeveless. I just love the detail of the sweetheart, the collar and the key hole in the back where it buttons up.


This top is so adorable paired with leggings or skinny jeans.


And look how cute it looks with the Sophie Jacket also by My Little Plumcake.


Just one pattern from My Little Plumcake and I promise you'll be hooked, like me!

Monday, October 14, 2013

Sneak Peek - Norah Pattern by Mouse House Creations

Just a sneak peek at a new dress/ tunic pattern by Mouse House Creations. This is Hayley's first digital pattern of what I hope to be many more! So many options: dress or tunic length, different sleeve lengths and different collar options to this design. I started out by testing the dress with short sleeves with a Peter Pan type collar with ties. So fun that this dress can be made in just about any fabric from knits to corduroy to woven cottons. Gorgeous design and beautiful fit!


The pattern is still in testing and should be out by next week. Can't wait to show you more!

Saturday, October 12, 2013

Boho Tunic by Whimsy Couture

During the past summer Whimsy Couture released thier pattern of the Boho Tunic, and yes I was lucky enough to test it. 


Amelia loves it and she got so much wear out of it! 


Soon after a second part to this pattern was created for a long sleeve option and I just had to try it out!


JubeJube's tunic is made from a jersey fabric, it makes it even more comfy. It was so easy to add the extension to the tunic pattern. 


There you have it, the long a short sleeve version of the Boho Tunic by Whimsy Couture Patterns

Wednesday, October 9, 2013

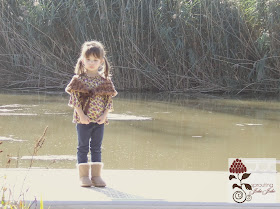
Fleece Booties by Whimsy Couture

I made these booties by Whimsy Couture and I can't believe how cute they turned out!


I used what I had on hand: some off-white micro fleece, beige stretch corduroy and Jiffy Grip for the sole. The corduroy is an option that I added on.
The pattern comes in sizes 0-3 months to 5T. I made size 2T for Amelia and they were a perfect fit for her feet, size 6 shoe size. They were easy to put together, the tutorial was easy to follow and had a ton of photos!


The sole of these booties have two layers, Jiffy Grip and micro fleece. The top part of the foot is also two layers, corduroy and micro fleece. The corduroy adds durability to these bootie slippers and the micro fleece adds the coziness needed to keep little feet warm. 


I let Amelia choose the buttons, she went with a wood painted button, a wise choice that really suits the style.

Tuesday, October 1, 2013

Skinny Jeans by Peek-a-Boo Patterns and making clothes that fit

I had set a challenging task for myself, to make a pair of pants for my niece that actually fit HER! Miss E. is very tall and slim so buying a pair of pants for her is like trying to get JubeJube down for a nap...It just doesn't happen.

I've tested patterns a few times for Pee-a-Boo Patter Shop ( affiliate link), here and here, and was never disappointed with the pattern tutorials or fit of the garment, so when I saw the pattern for thier skinny jeans how could I go wrong.

First things first, take good measurements: waist, hips, inseam, and natural waist line (right at the belly button) to the ground. Just because your child wears a size 6 in stores doesn't always mean they're a size 6 when it comes to patterns.

This is the actual size chart from the tutorial and these are the measurements I had to work with.


Its not as simple as just taking a size 5 and adding length for the legs, you need to account for some of the length of the body, after all you wouldn't want to have your child wearing really low rise pair of jeans. This is where the magic of adjusting a pattern begins.


I started off with the back of the pants, the easiest piece to adjust. Notice how the rise of the back gets longer as the size gets bigger, and its important to maintain the rise to the respcetive height that you need or you end up with a plumber's crack.


I traced out the pattern for the rise that I needed and then...


Went to the width I needed and traced out the rest of the pattern piece. I worked the front pattern piece the same way making sure to use the same sizes as I did for the back piece. Once all my pattern pieces were traced out I just sewed them up as explained in the tutorial.

This is what my back pattern piece looks like. Notice the rise and the leg length is the size 8, and the width for the hips and waist is the size 5.


For your first time making such adjustments to a pattern I would strongly recommend that you test it out on fabric that you're not in love with so if you mess up you end up learning from your mistake and you still have the fabric you love!

Little things that you need to remember: if you making a size 5 for the size of the hips and waist and an 8 for the height your back pocket needs to be a size 5 or your pocket will be too big! The front pocket opening needs to remain the same so that it can be useful as a pocket. 

Who's ready to see the end result!


See the rest of this shoot on my sister's blog, Tanya Zaleski Photocreations, the photographer behind these beautiful images.

Until next time, xx.