Wednesday, July 30, 2014

Delilah Pattern Blog Tour

Its my day on the Delilah Blog tour! Delilah by Golden Rippy is a very fun and easy-to-wear dolman top. Go visit their pattern shop, there's also a version for little girls by the name of Dahlia. Seeing that the fabric that I used has a print to it, I went with a very simple short sleeve version of the pattern. I kid you not, this top took me about an hour to make including cutting!


Here are some of the details:
  • This is a pattern sized XXS - XL 
  • Designed for knit fabrics
  • Has 2 sleeve options, short sleeves and a hald sleeve
  • Tips and cut outs included for flower and bow embelishments (because once you make one you'll be hooked and you don't want them looking all the same!)
  • Confident beginner pattern, and super easy to follow instructions.


I love that the neckline isn't low, makes it so much easier to run around after pre-schoolers, and I get to do it in style with this top. 


Also so easy to dress up for date night with hubby (and he did say he liked this one!).


Just so you know all opinions are my own and I did receive this pattern free in exchange for posting on the tour. 

Be sure to visit the other stops on the tour, so much inspiration on how to change up this top!


Monday- July 28
Tuesday- July 29
Wednesday- July 30
Thursday- July 31
Friday- Aug 1
Saturday- Aug 2
Sunday- Aug 3
Monday- Aug 4
Tuesday- Aug 5
Wednesday- Aug 6
Bebe Lambs   - Create3.5  - Lady and the Gents

Don't forget to enter the giveaway!

Until next time, xx.


a Rafflecopter giveaway

Sunday, July 27, 2014

Release Day for the Secret Garden Dress & Giveaway

I can't believe it! Finally, the Secret Garden Dress PDF pattern is ready to be released! This is where you can find the pattern on Etsy. Allison of E+M Patterns and I have been working on this on and off for a little bit now. I'm amazed at what two ladies who have never met in person from opposite sides of the country have created. I must admit that my part of putting the tutorial together was much harder than I thought it would be, but I couldn't be more proud of the end result. Thanks Allison for your constant encouragement and motivation! So you'll want to read to the end because we're going to give away a copy of the Secret Garden Dress PDF pattern to a lucky reader, and even if you purchase the pattern and you win you will be refunded!

The pattern has 2 views and each with their distinct style. The original idea was to have a dress with a flounce at the back. Then came the idea of the neckline and deep V at the back with side zipper.


I love the simplicity of the front of the dress and decided on making a version without the flounce and added a delicate ribbon to the waistline seam.


I used simple quilter's weight cotton for both dresses, but with the style of these dresses they could easily be worn for special occasions.


So one more thing! Thanks to the group of ladies that helped test this pattern out! Your time, effort and patience was so appreciated! Those little models were just so beautiful in there new dresses! Here's a look at some of the tester photos.


If you want to see more from our lovely testers some have blog posts up, I know you want to read what they had to say about this dress! Here are some links!

Amy at SewsNBows
Connie at Cranberry Ridge Design
Melissa at Rebel & Malice
Ula at Lulu & Celeste
Fatima at Conversas de Hermanas
Dorothea at Making Lists

Don't forget to enter the giveaway!

Until next time, xx.


a Rafflecopter giveaway

Thursday, July 24, 2014

E+M Pattern No.6 & Adding a Lace Insert & Giveaway

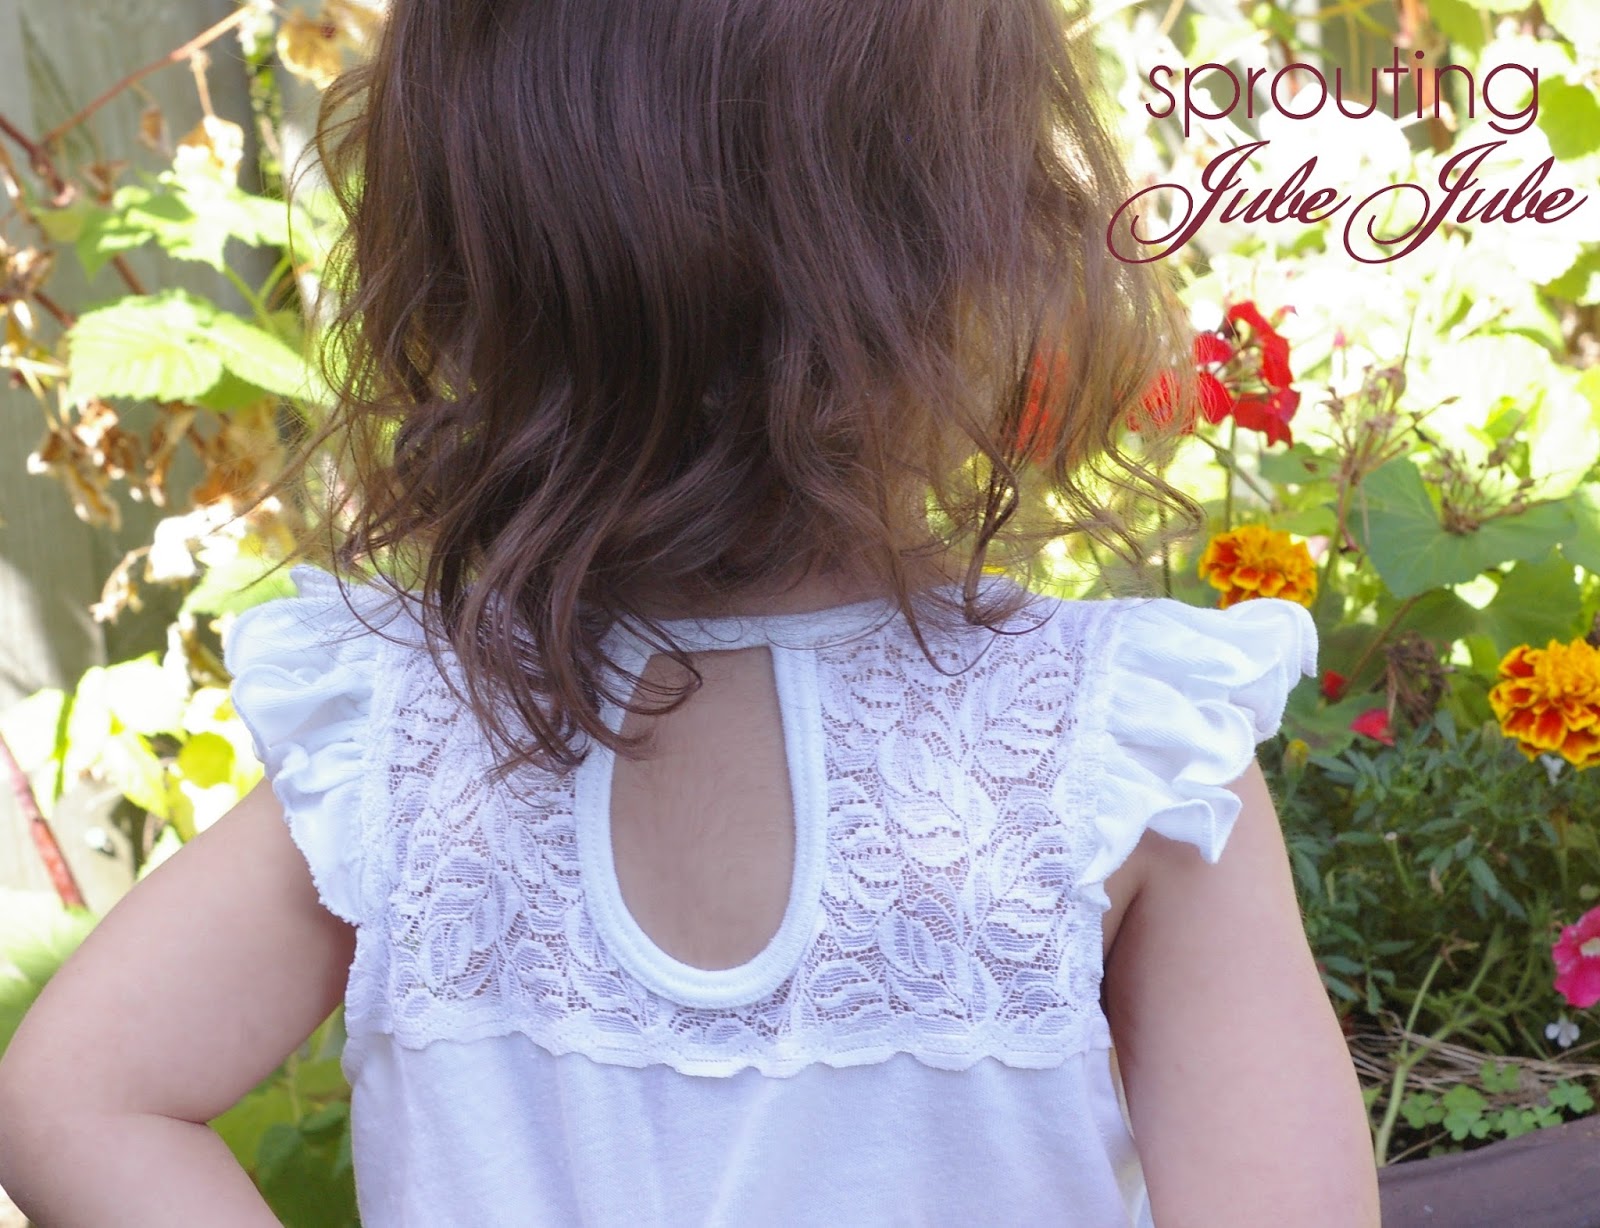
Pattern No.6 is now available from E+M Patterns,YAY!  This cute little top and dress has so many options to it, but you know me, I have to go and change something to an already perfect pattern. This time I did a lace insert at the back. If you don't want to use lace you can use another color to make a color bock at the back. I also added a little extra length to make it tunic length and also a little more a-line. I made the front with the pintucks and with the flutter sleeves. I used a rolled hem to finish off the edges of the fluttler sleeves and bottom hem.

Oh! and you'll want to read all the way to the end for the rafflecopter giveaway for a free copy of this pattern!


For this project you will need:
  1. E+M Pattern No.6 (and its on sale for a limited time) and the materials listed in the pattern tutorial
  2. Lace fabric with some stretch to it (about 10 inches)
  3. Measuring tape and ruler

Your pattern should be printed and assembled as directed in the pattern tutorial. Measure your little model to determine the right length for a tunic for her. I made a size 3 for Amelia and from the shoulder down the back I decided to go with 18" in length. I also made the hi-low hem so the front is higher than the back. Don't forget to add length for hems. Now you need to determine where you want your lace to be in the back of the tunic. I measured 1" below the key hole for mine. 

This is what my back pattern piece looked like when I was done making the modifications. Don't forget to make the same adjustments to the length and width to the front pattern piece.


Cut out your fabric, you should have one front, 2 flutter sleeves, one lower back and one upper back (which is the lace insert), and all the bindings for the key hole, neckline, and armscyes. 

Since I used a lace with a scalloped edge I thought it would be nice to use it to make it extra pretty, but if you don't have a scalloped edge for your lace simply match up the lower back and upper back with right sides together (RST), stitch them together with a 1/2" seam allowance. For lace with scalloped edge, overcast the raw edge of the lower back.


Lay lower back flat right side up and match the lace with right side up over the lower back.


And that's all there is to this pattern hack...The rest of the assembly is done as indicated in the E+M Patterns No.6  pattern tutorial. 


An extra little fun thing about this tunic, I'll be able to layer it with a long sleeve t-shirt come fall.


So that you've seen how to change this pattern up how about a giveaway to one lucky reader!

Until next time, xx.


a Rafflecopter giveaway

Monday, July 21, 2014

The Dress Name Revealed!

I want to start by saying a huge thank you to those who gave their name suggestions for the new pattern! 


Drum roll please.................... the name of this dress will be "The Secret Garden Dress" which means we actually have two winners! I will be contacting the winners by email and they will receive the pattern as soon as its released, on July 28th, 2014! You'll be able to purchase it the E+M Patterns website


So hang tight, just one more week waiting for this sweet dress! Congratulations to our two winners! 

Until next time, xx.


Thursday, July 17, 2014

Lily Rose Hi-Low Tank Dress by Sunday Girl Desings

You may have noticed I'm on a  bit of a vacation. I may seem to be really quiet, but its really not the case. So I'm taking the time to post about the new PDF pattern Sunday Girl Designs just released in their Etsy shop (at a realy low introductory price for a very limited time).

I was up at my aunt's on a little vacation to sew this little pretty up and was able to borrow her yard (forest at the back of her house) as the setting for this mini shoot.

There's a lot of options to this dress, including different pieces to the bodice for layering, pockets, hi-low hem. The sizes range from 3 to 8.


Love that huge bow in the back!


Buttons to close up the back bodice, got them from my aunt's stash ;)


A little bit longer that the average dress to make, but the details are so worth the added effort and time. The instructions are easy and clear to follow so this could be a fun one even for a confident beginner sewist.


Until next time, xx.


Friday, July 11, 2014

Elisa Halter Designed by Filles à Maman

This new pattern from Mel at Filles à Maman, what can I say, its this summer's must have! Just released and available in their Craftsy shop for a limited time for $6.00.

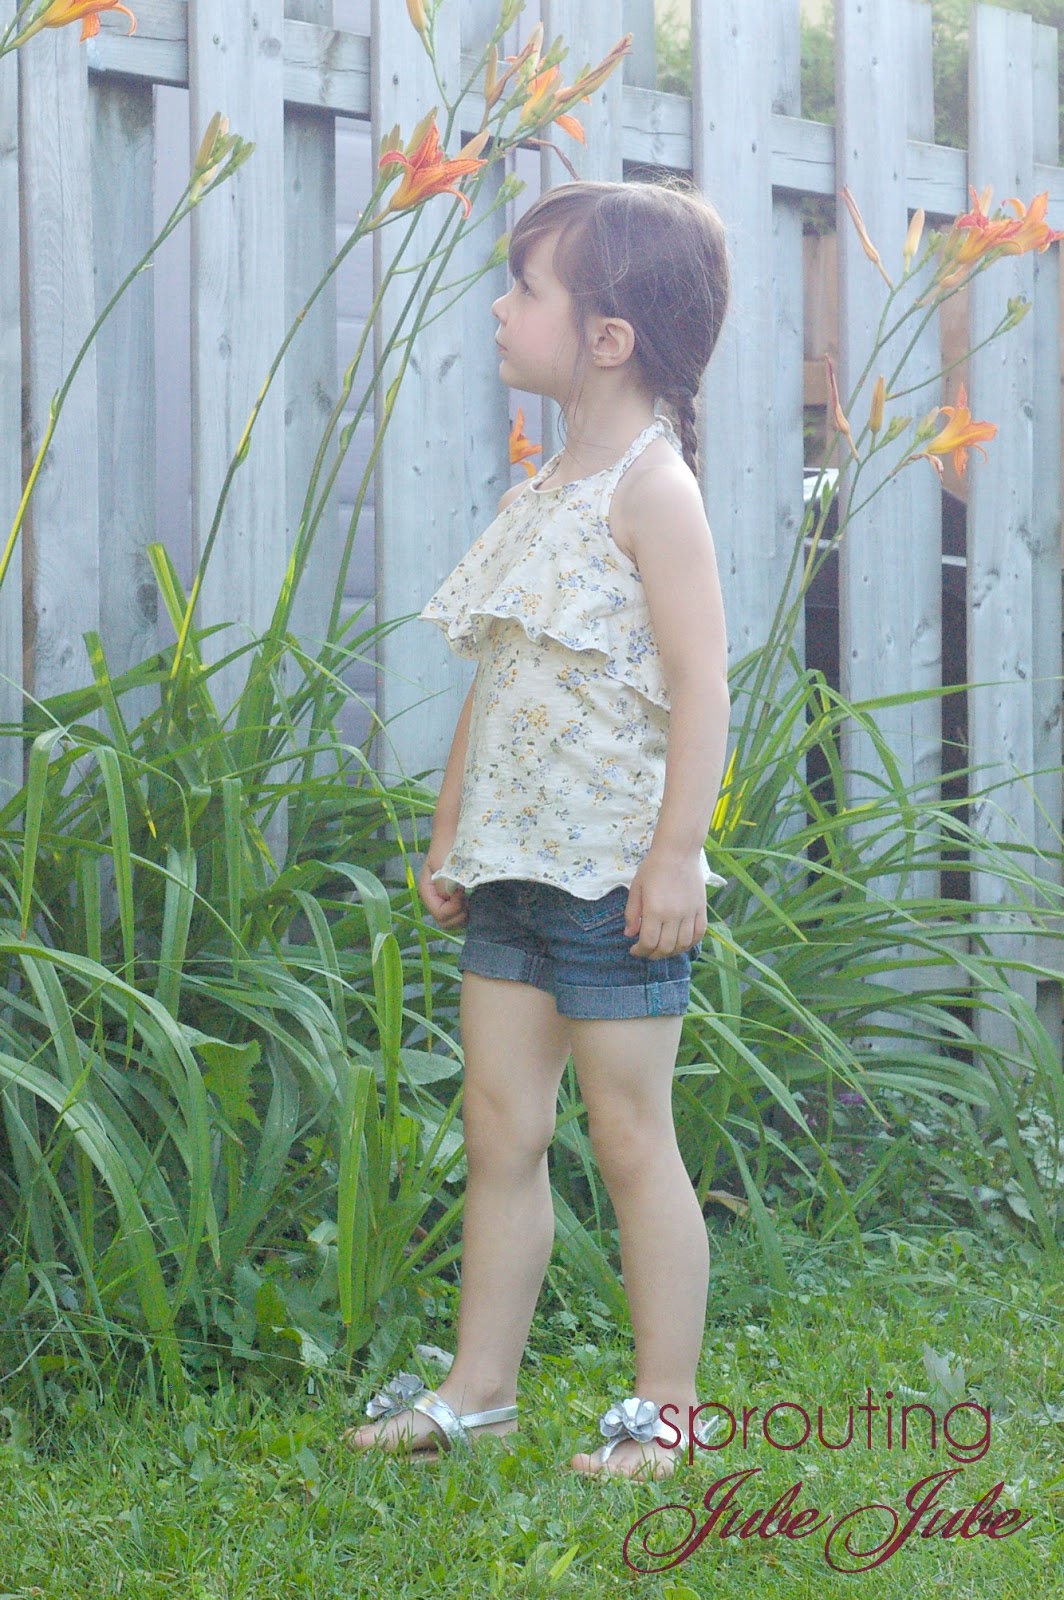
So yes, I tested it, how could I not, Filles à Maman's patterns are so great to work with! I made one for JubeJube in a knit and one for Amelia in a woven. They took about 30 minutes each to make and the girls were over the moon happy with their new tops.


I braided up some fabric stips to make the ties seeing that I didn't have any of the right color ribbon on hand and I think that worked out really well for this little knit top. 


I finished off the hem by using my serger and making a rolled hem. With a knit it gives a little more of a wavy effect. 


The woven pattern is a little bit flared so it isn't so snug around the tummy even though I love Amelia's little toddler tummy.


The ties for Amelia's top are just two strips of bias that I made to match.


The elastic at the back makes for a nice snug comfy fit.


See, told you my girls were happy with their tops...and only 30 minutes!


Until next time, xx.

Thursday, July 10, 2014

Name That Dress Contest & Giveaway

So we're still hard at work getting "The Dress" pattern ready for release. Allison from E+M Patterns and I have collaborated for the first  time (I hope not the last), and we've decided that this pretty dress needs a pretty name. All you need to do is leave your name suggestion in the comments with your email address so we can contact you if we choose your name for the new dress pattern. The winner will get a free copy of the new pattern as soon as its ready for release!


Until next time, xx.

Thursday, July 3, 2014

Scalloped Princess Dress Blog Tour

When Lydia of Little Kiwi's Closet asked me to be a part of the tour how could I say no to such a darling dress! A real princess dress for a soon to be 5 year old JubeJube. You'll want to read to the end, there's a giveaway for two patterns of your choice from Little Kiwi's Closet.
I took my little JubeJube on my shopping trip to the fabric store for this one. She kept telling me she wanted something yellow with sparkles. She caved when she saw the white cotton with a purple print (we are out of the pink phase!) that I suggested.  Got home, washed fabric, and tried to decide on a neck line. The Scalloped Princess dress pattern is so packed with options, you'll never make the same dress twice.


I finally settled on the square neckline and the scalloped hem. I made some adjustments to the bodice so that the bodice would be straight across rather than scalloped or in a front center point.


Buttons down the back to close up the bodice.


The scallops took along time to cut out and sew, but so worth it. The only suggestion I can make is take your time. All in all the dress is easy to put together and the instuctions are clear and easy to follow. 


Here are the other stops along the way, visit them for more inspiration! 


 July 1st
July 2nd
July 3rd
July 4th
July 5th
July 6th


Until next time, xx.

a Rafflecopter giveaway