Saturday, December 28, 2013

December Highlights

December was so busy, and to think its almost over! This December many elves were made and I was so glad to see photos of the elves in actions (making mischief) or just getting cuddles from little ones. 


We made snowflakes to trim the tree.


We thought of the neighbors with the classic cookie mix in mason jars (perfect for gift giving!)


Made PJ's for kiddos waiting for Santa using the classic footed PJ pattern from Peek-a-Boo pattern shop.


And finally a sour cream coffee cake for Santa, who by the way only left a few crumbs in his plate.


Oh, and one last one...Amelia waiting for Santa in her Caroline Party Dress, a pattern from Mouse House Creations.


See you all next year! xx


Wednesday, December 25, 2013

Footed PJ's for Christmas

I was asked (a while back) by a friend of mine about some footed PJ's and me being me said "OH yes! I'll make them."  First, I had a hard time finding a really nice knit for the job. Second, had zipper issues (couldn't find any the right color and length). In the end I do love the way all 3 PJ's turned out! They're perfect for waiting for Santa!


I used Peek-a-Boo's classic footed PJ pattern. The pattern is sized to fit newborns to size 12 years (you know I'll be using this one often). You might just want to visit Peek-a-Boo Pattern Shop, they have so many cute patterns available.


I made these PJ's with a light to meduim weight knit. Zippers are only half way down the front, zipper tabs, reinforced stitching at the crotch and non-skid soles just some of the features of these pyjamas. 


Sunday, December 22, 2013

A Little Family Tradition

Ok, again not sewing related, but I just wanted to share a bit of a family tradition. Sad but true, we don't set out cookies and milk for Santa, we do however leave him a piece sour cream coffee cake and a glass of eggnog. My brother, sister and I knew it was Christmas when we could smell that cake in the oven. The best part was getting to eat cake for breakfast Christmas morining.

Many years later, when I had young kids of my own, my mother insisted she come for a short visit Christmas Eve. She handed me a package, it was Santa's Brioche with a card and the secret family recipe.


Today my house is filled with the smell of sugar and cinnamon. Its almost Christmas and my son, 17 year old Sebastien, will be asking my for a piece when he walks through the door. And yes I will be eating it for breakfast Christmas morning with my four kids.

It would be such a secret any more, but if you'd like to make your own...

* Cream together 1 1/4 cups of sugar and 1/2 lb of butter

*Add-
3 eggs
2 1/2 cups self-rising flour
1 tsp. baking powder
1 tsp baking soda
1 tsp vanilla
1/2 pint sour cream

*in a small bowl combine
1 cup finely chopped nuts
2 tsp cinnamon
1/4 cup white sugar

Put half of the batter in a greased bundt cake pan. Sprinkle with half of the mixture. Add rest of the batter, then top with the rest of the nut mixture. Bake in a preheated oven at 350°F for 1 hour.


This is my tradition, please do leave me a comment on your traditions, I would love to read them.
Wishing you and your family a very Happy Holiday Season. xx

Friday, December 20, 2013

Classic Cookie Mix for Gift Giving

I was looking through a children's cookbook to find some quick and easy treats to make for Christmas. I figure children's book = easy and fast. Instead I found an easy gift to give for neighbors and teachers. Ok, not so original, I know its been done before but I've never done this before. Cookie mix in a mason jar. Under 15 minutes I had made two jars, and this with JubeJube and Amelia asking me for snaks and their favorite show, and me telling them no, its not TV time.


Just incase you need a last minute hostess gift here is the recipe that I got from "Chock Full of Chocolate" by Elizabeth MacLeod. 

The jar is filled with;
1 3/4 cups all-purpose flour
1 tsp. baking powder
1 tsp. baking soda
1/2 cup each of brown sugar and white sugar
1/4 cup unsweetened cocoa powder
1 cup chocolate chips
3/4 cup chopped pecans (I used walnuts and almonds)

Sift first 3 ingredients together. You can layer the ingredients how ever you like. I mixed my white and brown sugar together. Each layer needs to be packed firmly.

Don't forget to print out the instructions on how to prepare the cookies.

  1. Preheat oven to 180°C (350°F).
  2. Pour cookie mix into large bowl and blend together. Add 3/4 cuplof soft butter, 1 egg, and 1 tsp. vanilla. Mix well
  3. Sahpe batter into 1 inch balls and arrange about 1.5 inches apart on an ungreased baking sheet.
  4. Bake 10-12 minites, until slightly firm. Let cool for 5 minutes, then transfer to cooling rack. 
This mixture can be stored at room temperature for up to 1 month.
Makes about 3 dozen cookies.


The longest part of this project was actually printing out the cards with the instructions on how to prepare the mixture, gluing them to cardstock and attaching the tag with raffia ribbon to the jar. 


Monday, December 16, 2013

The Caroline Party Dress by Mouse House Creations

My Amelia has just been transformed into a princess thanks to the new pattern from Mouse House Creations, The Caroline Party Dress. The PDF pattern is available as of Monday in their Etsy shop. This is one pattern I was so glad to got to test! I chose the super simple options for Amelia, no pockets, no collar, no belt loops, but I did make it with the tulle underskirt. Once I put the dress on her "the beast" had been tamed and she was twirling around like a ballerina. 


The pattern features a high waist line, knee length dress, fully lined bodice and faux cap sleeves. Options of inseam pockets, peter pan collar, and belt loops are all explained in the tutorial. The tutorial is so simple to follow and there are even tips for a super easy zipper installation. I couldn't believe how fast the dress came together.


For this dress I used a pink taffeta that has a velvet polka dot to it. FYI don't even drop water on taffeta because you will stain your fabric, and don't ask why I know this. I used a polyester lining for the underskirt and bodice and an invisible zipper down the back of the dress.


And there you have the ballerina twirl. 

Friday, December 13, 2013

Hooded Blazer by My Little Plumcake

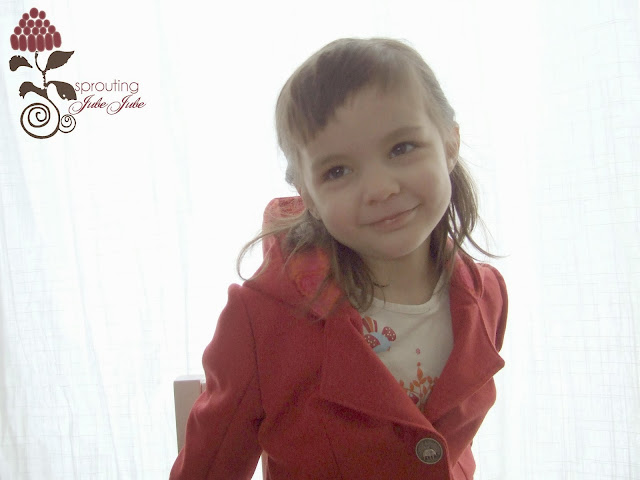
Love this blazer that I got to test, is pretty much all I need to say about the new pattern due to be released by My Little Plumcake early next week. First, its unisex! Yay, something unique and stylish for boys too! Second, it features so many options like a hood, appliqué pockets with pocket flaps, front darts for a more fitted look on the girl's version, and elbow patches.


I made mine super simple using a wool blend that I already had (given to me by a friend), some left over flannel for the lining and some upcycled buttons that JubeJube chose from my stash. Total cost of this project 0.00$...Yay! And yes that is a smile on JubeJube's face so that means she was pretty happy about getting a new red blazer.


Very quickly showing off the inside of the blazer. I used a bias tape just to be a little fancy on the inside but it really was not needed.


I just love the style of the rounded edges at the bottom front of the jacket.


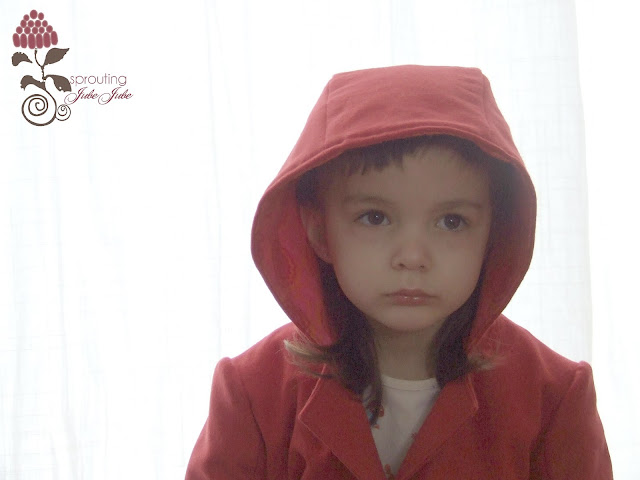
The hood, not JubeJube's favorite part as you can see by the look on her face when I tried to take a few shots of the hood on her head. 


Other patterns that I've had a chance to work with by My Little Plumcake: The Hope Patter here, and here, The Sophie Jacket, and Cordelia. Be sure to check out My Little Plumcake's Etsy shop for more unique patterns!


Tuesday, December 10, 2013

Using Bias Tape to Trim a Receiving Blanket

Some have recently asked me how to use bias tape, so I thought that I'd write up about it and at the same time make an easy handmade Christmas gift for a little lady.


I know I'm starting by the end, but the whole point of using bias tape is what the end result will look like. I love this print, makes me think of snowflakes and I love the way the bias tape makes the blanket looks crisp and clean and pretty.


This is what I started out with...flannel and bias tape. I cut out the fabric to the size I wanted the blanket to be, usually 44 inches by 37 inches, and used a 10 inch round dinner plate as a guide to round out the corners  of the blanket.


So there you have it, a huge spool of bias. I buy it in large quatities because I just hate having to run to the store in the middle of a project because I didn't buy enough, but you can also get it in small packages of about 3 meters. You can also get it in different widths for different projects.


Notice how the tape is folded in two and again in two on each side. 


Once completely folded along its length you will notice that one side is slightly wider than the other, and there is a perfectly good reason for that...and here it comes...


For best results you start with the wrong side of you fabric and the side of the bias that is the smallest. Don't start right at the edge of the bias, so that when you've made it around your blanket you can simply fold over the tape (like in photo #2) for a nice finsh. Stitching right in that fold line is very important when you go to sew on the "right" side so take you time. When you've sewn completely around cut your thread, check your work to make sure all is perfect and that you won't have trouble folding over your bias. 


So you're half way there! To finish off, fold over twice (photo #1 and #2) and remember you want to hide the seam that you see in photo #1. Place you project under the presser foot and away you go another time around your blanket. Snip your threads and press all the way around for a nice clean finish.


All done! The bias tape not only adds to the style but also to the durability of the blanket and your baby will love it as she becomes a toddler.


Friday, December 6, 2013

Beaded Snowflake Ornaments

I am still amazed today by all the different snowflakes mother nature creates. How in diffrent temperatures the flakes are sometimes huge or sometimes look like diamonds falling from the sky. JubeJube was very upset today to see the snow had melted due to the mild temperature, I promised her that there would be more of the fluffy white stuff soon enough. I took some time away from sewing to make some very easy beaded snowflake ornaments to mimic diamonds falling from the sky.


I found metal snowflake forms all ready for beading a my local craft store.


Some of the tools I used: wire cutters, and round nose pliers. If you don't have round nose pliers you can always use flat long nose pliers.


I selected different shades and shapes of blue and white glass beads.


Put them together with my oldest daughter, Sabrina, for some quiet daughter/mother time.


Hang them in the tree or in the window to let the sunlight catch the glass beads.


Tuesday, December 3, 2013

Julia Women's Cardigan by Mouse House Creations

This time a little selfish sewing going on in my work shop. Hayley from Mouse House Creations has launched her second pattern AND, YAY, its for women! I should also mention that the sizes range from XS to XXXL.  This pattern is now available in their Etsy shop.


When you look at the sketch so many options are available, you can't make just one. Since I was in a bit of a time crunch I had to choose only one, but believe me, more of these will be making their way out of the workshop and into my closet! So recovering from my sinus infection and still having the chills I went with the long sleeve and used a heavier knit (that I've had in my stash for about 8 years). Honestly this pattern super easy, it took me just under an hour to sew up. I put it on for a few photos and didn't take it off all day. That my friends is comfy and cozy!


Amazing what a comfy cardigan and a little makeup can do! I love the detail of the cuff at the sleeve, this allows you to adjust your sleeve length after trying it on so you don't end up with super long sleeves. I used a rolled hem for an easy no fuss finish.  


Monday, December 2, 2013

Fleece Jacket by Whimsy Couture

In mid November I had the chance to test out another pattern by Whimsy Couture. With JubeJube in tow I went to the store to choose some fleece. She spotted it and would not change her mind. JubeJube wanted a pink plaid fleece for her new jacket. You might have seen parts of it here. This jacket was so easy to put together and the results, well just take a look and see for yourself! 


The length of the coat goes to the hips and flares out slightly. The pattern and  tutorial offers so many options; with or without hood, ruffles down the front and round the hood and even the option to have a removable hood (it attaches with snaps!). 


JubeJube really loves the hood on this jacket!


I had mine close up with 3 buttons and used button loops which was not one of the options offered in the pattern but I wanted the jacket to stay closed up tightly since it was getting cold outside. The pattern suggests one hand sewn snap at the neck line.


I think you'll have to agree that JubeJube is getting pretty good at choosing fabrics that suit her.

Sunday, December 1, 2013

Catching up and Saying Good Bye

This week has been about catching up with custom orders after being MIA for a week after being so sick. I started the advent calendar with the girls, but they have yet to see their elf, Morton. I'll keep you updated on some of the trouble he gets into. Until then here are some of Morton's friends saying good bye.


Good bye little elves, stay out of trouble!